Showing posts with label Accessories: Scarf. Show all posts

Saturday, November 2, 2019

Pink Lacy Cowl - from Cast On to Bind Off!

(Topic: Knitting)

Hi Friends!

This project was a quick one between others, with a pattern that I could easily memorize and let my fingers work on while I watched tv or listened to music. At one point I listened to one of my sisters play in a concert via a livestream, and knit on this project the whole time! The pattern was simple and repetitive, so it was easy to automate.

The original pattern picture.
I was petting a store model, which is what convinced me to buy both the yarn and pattern. Interestingly the store model had a mistake row about halfway up, so I was super careful the whole way because I wanted mine to be right!

Initial cast on. The markers are to help count.

You can see how after joining, this ended up being a pretty tight circle.

I ended up casting on twice, because initially I used the needle size that the pattern recommended, but wasn't sure it would end up draping at all! So I went up a needle size and tried again. The gauge seemed much better the second time.

However, in hindsight, I wish I'd thought to use a very stretchy cast on. The cast on edge, and even the slightly stretchy bind off edge, are very firm and much smaller in circumference than the bulk of the cowl.

I believe this is of the second cast on.

Starting to take shape!!

You can see the lacy form taking shape. The pattern basically alternated between purl rows and a lacy row, so it was easy to memorize.


Getting close to done! The tiny bundle is my tail from casting on and just needs to be trimmed and woven in.

One of the few minor annoyances with this project overall is that my skein had a knot. That's annoying, and tends to be a large company thing. So my project has one knot in the middle, if you look really closely. Pooh.

As I got close to the end, it became difficult to know how many rows to go. I felt like I was playing "yarn chicken" for probably the last 20 rows, because the yarn was so fine I kept thinking a row would use more than it did!

I ended up trying a few different bind off techniques. I wasn't happy with any of them - all of them created a tighter edge than the lacy fabric.

Finished! This is doubled - a little tight to put on, but snuggly.

Draped version. Note that the edge closer to my neck is BOTH bound off edges... it naturally folds in half because the bind off and cast on are both much tighter than the fabric, which has amazing drape.
Overall, this was a great project because the instructions were clear (aside from not suggesting a particular cast on or bind off), and because it was easy to work and memorize. It was a great filler project between more complex items I was working on (and needed a break from!).
That said, I'm not as impressed with it as a product. I probably could have cast on and bound off with bigger needles and then used the pattern size needle for the body and ended up with a more even hand, but because I followed the pattern, it has strange edges. I love the softness, but not the style, so I'm not sure how much I'll actually wear it.


Yours,

Sarah

To subscribe, find the "subscribe by email" note in the left column and enter your email there. Links to posts will be emailed directly to you whenever I post them! Nothing else gets emailed.

Resource list: Visit my spreadsheet at www.tinyurl.com/infantloss

Saturday, April 13, 2019

Folia Cowl, post 3 (work in progress)

(Topic: Knitting)

Hi Friends!

Remember this gorgeous yarn?


Look at that hand-dyed shading! Swoon!
You may remember this yarn from the leafy shawl I posted about here, here, here, here, here, and here (it took a while to finish!).

I also bought these buttons, but didn't use them on the cedar leaf shawlette.

On my current pattern, the Folia Cowl (which WILL use the buttons), I already posted here about figuring out the gauge and starting the initial seed stitch band.

Then here I posted this picture, of the first full lace repeat:


Well, I'm now well on my way! It's not nearly done (I think I'm about halfway) but the lace repeats are fitting together nicely and looking leafy and wonderful.

A drapey picture with TERRIBLE lighting. It's not this awful color.

A much nicer picture. Isn't it GORGEOUS? I think it needs to be about twice as long, and then I'll finish with a buttonhole band, and add the buttons to the end already done. And of course I'll post pics of me wearing it! At this rate, though, don't expect anything till at least fall...
I'll keep you updated. Progress may be slow, but I'm loving how it's turning out!


Yours,

Sarah

To subscribe, find the "subscribe by email" note in the left column and enter your email there. Links to posts will be emailed directly to you whenever I post them! Nothing else gets emailed.

Resource list: Visit my spreadsheet at www.tinyurl.com/infantloss

Saturday, February 2, 2019

Keeping Pookie Warm

(Topic: Knitting, Weighted bear clothing)

Hi Friends!

A few weeks ago we had a cold snap and a lot of snow. On the spur of the moment, I decided Pookie needed some cold weather accessories! He didn't have a scarf yet, and though he did have mittens and hats already, I figured a matching set would be fun!

I started by rummaging in my yarn stash to see if I had something that grabbed my eye. You may recognize this yarn: I used it before on a color-pooled crocheted scarf! For this project, though, I'm just using it as a variegated yarn without worrying about trying to pool the colors into a pattern.

I started by casting on to what looked like a good width, and created a 2x2 rib for about an inch and a half as a border. I then just knitted every row (which creates a garter stitch), until the scarf looked like it was the right length!


The result! I'm quite happy with this. It wraps well but is just long enough that if I want to put a knot in, I can.

Well! One piece down, mittens and hat to go! I decided to work the mittens next, fitting them as I went. Because Pookie's paws are pretty small, even using magic loop didn't feel like a great idea, so I worked the mittens flat. I then drew the top together, and seamed the side.

Cuff is on the left. See on the right, where the top of the mitten is, that I have a light blue bit of yarn drawn through the last row of stitches? That's what I pulled to cinch the top of the mitten.

Cinched and seamed! This is the inside of the mitten.

It looks like a muffin!!! If I ever need to knit toy muffins, I'll do it like this! Well, maybe not, since it wouldn't have a bottom.

I added a string, because I really don't want to loose them by accident (I've lost Pookie's rain hat already, which I consider to be a tragedy of the highest magnitude. I'm not going to loose a hand-knit mitten because I didn't take the time to tie it on!). The string is 6 strands of yarn, braided.

Snug in his snowsuit, and modeling the new scarf and mittens!!

Still chilly. Pookie borrowed my couch snuggle blanket.
 Well, if Pookie is still cold, I'd better throw together a hat! I decided to do this in the round, using the magic loop technique so I would have flexibility to try it on him easily, and also so I wouldn't have to change techniques as I decrease toward the top.

I started with a 2x2 rib again, so that it would match the edging on the other pieces. Since I was shaping as I went, rather than following a prewritten pattern, I decreased when I got high enough for it to get over his ears. With the rib pulling it tight below, and since I didn't change needle size to a larger one or decrease the stitch count, the brim pulls inward and then it bulges out - and the goes pretty flat on top to match his head shape. This means that it looks a bit funny when it's not on him, but looks great on his head!

I also decided to add a pompom, just for fun! The annoying thing about doing a garter in the round is the same as doing stockinette flat: you have to alternate purl rows with knit rows, so you have to be sure to know where your round starts and ends.

"Yes? Oh - yep, I love the hat!"

Modelling the hat. If you look closely, you can see the braided tie, tied under his chin, to help prevent accidental hat loss!

We found out that, due to the interesting shaping, that it works as a tam too!

I'm really glad I added the mitten string, because he has no wrists to help keep the mittens on! They have a tendency to slide off, but they stay on pretty well if the cuff of the sweater or snowsuit is over the mitten.

Yours,

Sarah

To subscribe, find the "subscribe by email" note in the left column and enter your email there. Links to posts will be emailed directly to you whenever I post them! Nothing else gets emailed.

Resource list: Visit my spreadsheet at www.tinyurl.com/infantloss

Saturday, November 10, 2018

New Folia Cowl, post 2

(Topic: Knitting)

Hi Friends,

One picture for this update! I've managed to complete the first full repeat of the lace pattern on my new cowl. Going well so far!


Yours,

Sarah

To subscribe, find the "subscribe by email" note in the left column and enter your email there. Posts will be emailed directly to you whenever I post them!

Resource list: Visit my spreadsheet at www.tinyurl.com/infantloss

Saturday, November 3, 2018

Completed Cedar Leaf Shawlete

(Topic: Knitting)

Just a quick update today.

I promised completed pictures of the Cedar Leaf Shawlette, and here it is! Completely blocked and beautiful. I'm thrilled with how it came out!


Yours,

Sarah

To subscribe, find the "subscribe by email" note in the left column and enter your email there. Posts will be emailed directly to you whenever I post them!

Resource list: Visit my spreadsheet at www.tinyurl.com/infantloss

Saturday, October 27, 2018

WIP Leafy Cowl

(Topic: Knitting)

Hi Friends,

I know I just finished the other and don't have pictures of the completed, blocked Cedar Leaf Shawlette yet, and no pictures of me modelling it for you yet, but I promise they'll come soon! Probably next week :)

However, my needles have not been idle.

The next new project is actually using the same yarn (from Looped Yarn Works, the same Aleister color way). If I mathed right, I should have enough for this project too, without having to make it short! We shall see!

This pattern, Folia Cowl: A design for Fearless New Knitters, from Try This At Home Designs (by Giovanna Clementi in Canada), initially really excited me. It seemed to have a lot of written out explanation, and markets itself as for adventurous but inexperienced knitters. Since I'm largely self taught but do pretty well with most patterns, I was hoping to use this to actually check if I have gaps in my knowledge.

The first thing most patterns call for is to make a swatch, to see if your needles and tension result in the right size (because we all hold and tension the yarn a little differently, we sometimes have to adjust the needle size to basically force ourselves to match how the pattern maker tensions things - this means we should end up with the same size finished item).

Interestingly, while the pattern did list gauge information (stitch count by row count), it did not actually tell the user how to do it, nor did it tell you what size the finished swatch was supposed to be! (Standard is often 4" x 4", but it wasn't specified.)

My first swatch. My first mistake was that I often confuse which technique matches the words "stockinette" and "garter" so I did the wrong one (hazard of being largely self-taught). This means that nothing came out right, and I got confused.

Since I was confused without realizing my error,  I thought maybe the stitch and row counts had accidentally been reversed in the pattern. Of course, since that wasn't the issue, this turned out a strangely tiny swatch.

Since I was getting such confusing results, I decided to test the beginning of the pattern. Instead of being too small, like swatch 2, it was too big, getting close to a 14"  width instead of a 12" width.

At this point I had managed to thoroughly confuse myself. I reached out to a glorious genius amazing knitting friend :) who soon spotted my error. I had swatched with the wrong stitch! Garter was what I had used (bumpy on both sides by knitting in both directions) and stockinette is what I should have used (smooth on one side and tightly bumpy on the other, formed by knitting in one direction and purling when returning in the other direction). So I re-swatched, going down a size needle because my test rows of the actual pattern had been so wide.....

Much closer to 4" x 4". Also, my awesome friend pointed out that the width of the swatch is more important than the length, and I was just about right on, width wise, and not far off, length wise... I swatched this on #9 needles.

I'll be honest, I also did  another swatch or two, because there was a confusing item on the gauge page. The pattern comes adjusted for 2 weights/thicknesses of yarn: worsted and bulky. My yarn is slightly thinner than worsted, varying between a worsted and a dk, and is not consistant, so I'm working with the worsted numbers. On the worsted section, my gauge stitches were 17 x 11 rows (big number cast on, small number of rows); for worsted it was 12 stitches by 18 rows (small number cast on, big number of rows). I don't know if this is right, since I didn't have bulky to test with, but the width of my swatch came out ok with 17 cast on, so I got muddled by that apparent inconsistency when I confused myself with my mistake!

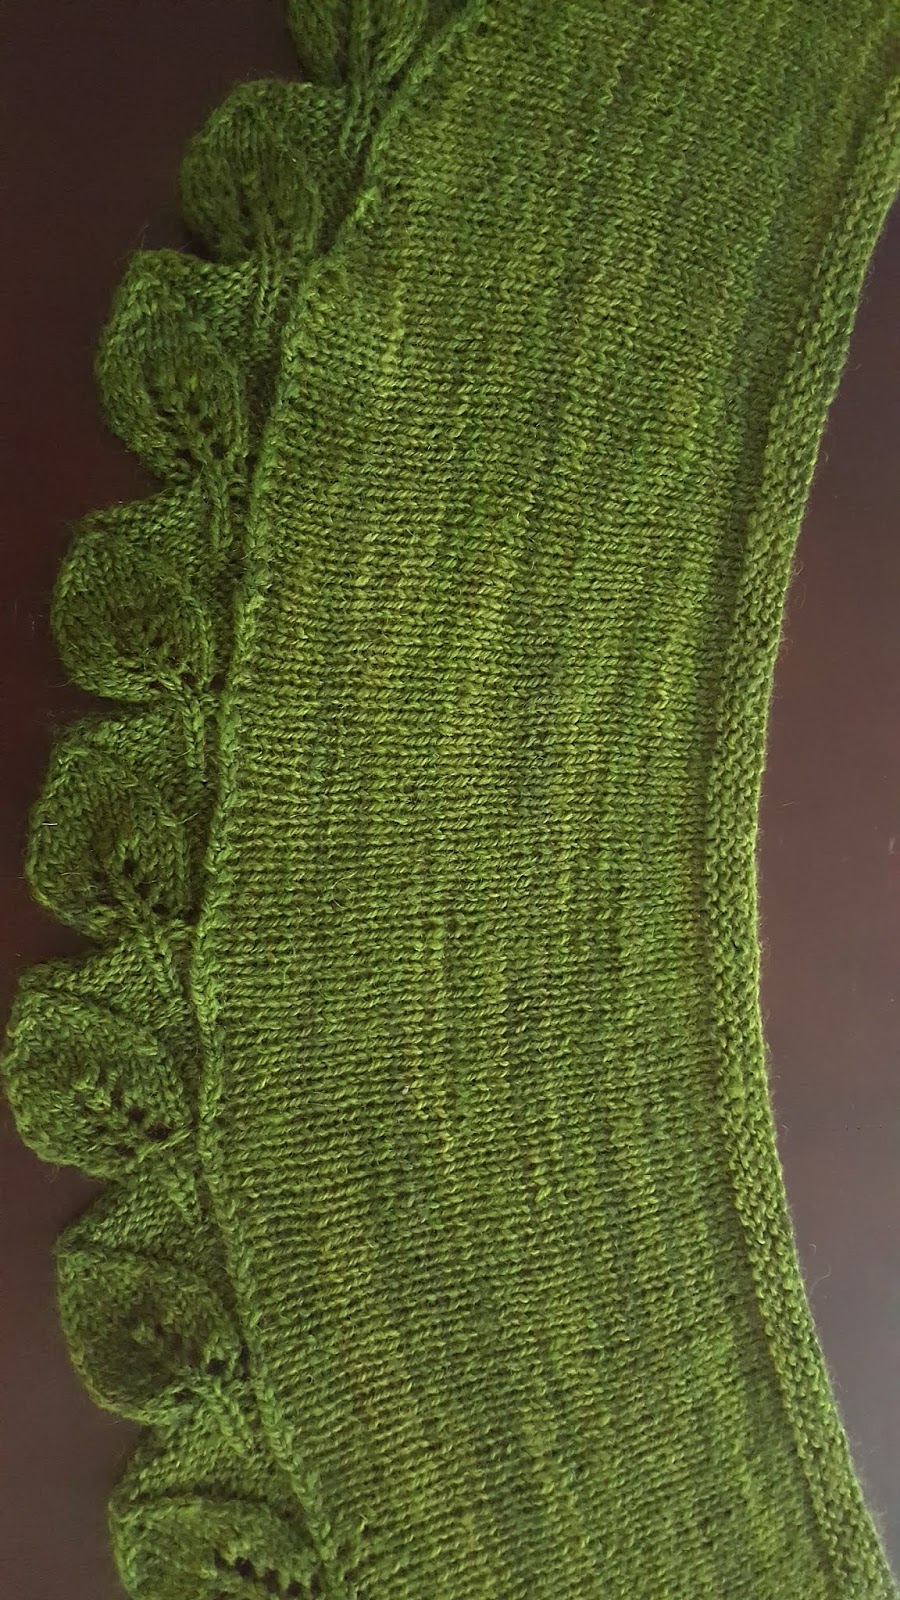
The first several rows are seed stitch, which is pretty straightforward.

Of course I'll be updating you as I figure out the lace pattern! So far it's just a band, so it's really hard to tell how the finished product will look or even whether or not the pattern will be easy to follow. I'll let you know!!!


Yours,

Sarah

To subscribe, find the "subscribe by email" note in the left column and enter your email there. Posts will be emailed directly to you whenever I post them!

Resource list: Visit my spreadsheet at www.tinyurl.com/infantloss

Saturday, October 20, 2018

Completed Green Cedar Leaf Shawlette

(topic: knitting)

Note

This post is a "Saturday Hobby" post. During October (Pregnancy and Infant Loss Awareness Month), Wednesday (stillbirth blog themed) posts are more specifically about awareness and sharing about Pregnancy and Infant Loss. However, sticking with my usual format, Saturday posts still showcase fiber crafts I'm currently working on! Please join us again later this week to read about the statistic and numbers surrounding pregnancy loss.


THE CEDAR LEAF SHAWLETTE --- DONE AT LAST!

READ ALL ABOUT IT, READ ALL ABOUT IT!
Yup, I'm finally done (mostly) with the shawlette! In time for my self-imposed deadline, too. Below are pictures of the final product.
Why "mostly done"? Because it is currently in the process of blocking (drying while pinned in shape, so the wool learns where to be, so the pattern is fully visible).

Fully finished, just needs the ends woven in! Note that the leaves are pretty curled under. Blocking should fix that.

A possible outfit (seeing which shawl pin I like!). Again, many of the leaves are only half showing - pinning the shawl while wet and letting it dry (because it's all wool) should teach the wool fibers where I want them to be, and will hopefully make the leaves more visible!


This is what it looks like right now, pinned in shape. The top of the shawl could have been pinned straight, but then the leaves couldn't open fully. Since I'm usually going to be wrapping this around my shoulders, the curve of the top edge won't show, and I'd rather have the leaves fully uncurled anyway!

I had great fun making this project. I'm already casting on the next project, but I promise I'll post a picture of me in this shawl at some point!


Yours,

Sarah

To subscribe, find the "subscribe by email" note in the left column and enter your email there. Posts will be emailed directly to you whenever I post them!

Resource list: Visit my spreadsheet at www.tinyurl.com/infantloss

Saturday, September 29, 2018

Cedarleaf Shawlette WIP Update 4

(Topic: Knitting)

Hi Friends!

For those of you who are new readers, my posts alternate: Saturdays are something light and usually related to my hobbies, so they are often posts about things like knitting or crafting projects. Wednesdays I post about things related to grief, the grief journey, and life after loss. Welcome and I'm glad you're here!!
I sincerely hope that something I say ends up being helpful to you in some way, whether you are a non-infant-loss person learning about it, or an infant-loss person getting comfort or resources, or just knowing there's someone else who has been through somewhat of the same experience you have.
Please feel free to comment on any post, and read through older posts to get to know me, Charlie (our son who was stillborn in 2016), and my hubby!

Today's post is the fourth in a series showing my progress on a shoulder-wrap shawl. I have a completely self-imposed deadline of October 24th (I want to wear it to a conference I'm attending), which I think I'll make since I have lots of car trips between now and then, where hubby is driving and I'm knitting! I've even figured out a way to clamp my pattern in the glove box so it doesn't keep sliding off my leg!

This shawl is an arc of fairly plain knitting, with just some held stitches at either end to build up an arc, and then the leaf border is added to the live edge, essentially knitting with the needles perpendicular to the live edge. I'm loving how it's turning out!

About 1/3 done with the edging!!! So pretty. Love how it's variegated, but subtly.

Ahhhhhh the leaves... Fall is my favorite season, so this will be perfect.

It even has a stem! I'm so in love with this pattern. And the wool is perfect for it, honestly.

A look at how the leaves are being worked up along the edge, and picking up and incorporating live stitches as I go.

Can't wait to have it finished, show you pictures of the completed shawl and me wearing it, and do a bit of a pattern review! Just keep an eye out on Saturdays. If you want to be notified every time I post something, just follow the instructions below to subscribe. The notifications are the only emails you get, no spam!

Yours,

Sarah

To subscribe, find the "subscribe by email" note in the left column and enter your email there. Posts will be emailed directly to you whenever I post them!

Resource list: Visit my spreadsheet at www.tinyurl.com/infantloss

Saturday, September 22, 2018

WIP Cedar Leaf Shawlette Part 3

(Topic: Knitting)

Hi Friends!

Yet another update on how the shawl is progressing. Well, I completed the body of the shawl and have moved on to the edging.

The edging is made up of 30 (!) leaves, each knitted alongside and connecting to the body of the shawl, along the outside (not the neck) edge.


The pattern calls for using a dpn, but I'm finding that using the other end of my circular needle is working just fine, and I'm less likely to lose it!

The pattern is written out and also presented as a chart. I've never used charts before, but with them side by side I found it pretty easy to learn. I really like using it! I have to remind myself which row I'm on and because of that, which direction to read the chart... but it's waaaaay easier to keep track of what to do in a car, where reading the print while juggling the pattern, the knitting, and my marker can be really tricky! I found that tucking the pattern in the glove compartment door and reading the chart instead of the abbreviations was so much easier.


Yours,

Sarah

To subscribe, find the "subscribe by email" note in the left column and enter your email there. Posts will be emailed directly to you whenever I post them!

Resource list: Visit my spreadsheet at www.tinyurl.com/infantloss

Saturday, September 15, 2018

WIP Green Leafy Shawl part 2

(Topic: Knitting)


Dear Friends,

Bit by bit! My time for knitting comes in awkward chunks right now, so my work progresses in fits and starts. That said, I've managed to finish the body of my shawl!

Knitting in the car. The stitch markers are every time I turn before the end of a row, leaving more stitches behind. This means I build up the middle while the ends stay narrow.

The whole thing, still coiled on the cable. This picture is close to true color.

Spread out on the love seat. The bottom edge in the picture is the neck edge; the top edge with the long cable in it will be integrated in the leaf pattern, picked up as I go.

Next step, leafy edges. Looks like fun! I actually can't wait to wear this. The variation in the shades of green is subtle and gorgeous, and I think this will be a darling piece to wear.

Yours,

Sarah

To subscribe, find the "subscribe by email" note in the left column and enter your email there. Posts will be emailed directly to you whenever I post them!

Resource list: Visit my spreadsheet at www.tinyurl.com/infantloss