Showing posts with label Material: Buttons. Show all posts

Saturday, November 23, 2019

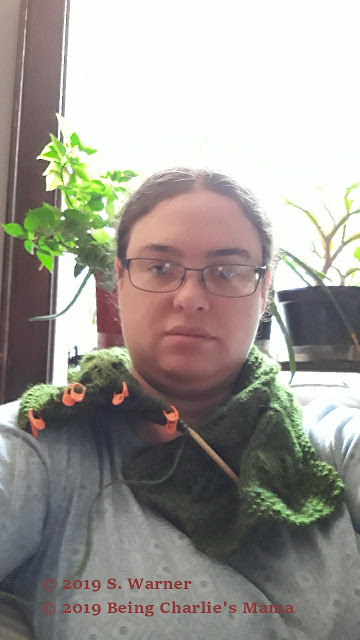
Completed Folia Cowl (the "leafy cowl") post number 4

(Topic: Knitting)

Hi Friends!

Gosh, this one took forever. I'll check the dates on my first photos in a minute to get a ballpark of how long this took, but I'm thinking it was close to a year from start to finish.

... yep, I started it in late October 2018...

The reason this took so long was not that I'm a slow knitter, but that this project got put in timeout several times for being complicated, and slow going.
The complicated part was the lace: the lace pattern was two leaves wide and two leaves tall, so for my total width in the cowl I did: edging, 3 repeats of the lace pattern including a purl 2 border between each one, and the edging again. This meant that my row was fairly long, and the lace pattern was 20 rows tall for both leaves. I had to keep track of where I was both horizontally and vertically, and remember to repeat the row of the pattern three times to actually complete a row of my actual cowl.
Because of several factors, it was slow, too: all that keeping track slowed me down; marking where I was on the pattern slowed me down; some of the fancier stitches slowed me down - but mostly because of counting to where I needed to put them, because the pattern was impossible to memorize, so I had to watch what I was doing more closely; and the yarn was scratchy which meant it didn't glide as smoothly.
And because of both the complicated and the slow, I got bored with it fast and didn't do long sessions of knitting as often, and didn't pick it up as often because it wasn't as fun.

HOWEVER, the pattern was pretty well written (if a bit over-complicating things a few times), and the chart was easy to follow (it was actually the first chart I worked with. This pattern was geared toward "ambitious beginners" and had a written version as well as a chart version, so that "rosetta stone" helped me figure out charts! I've since done others successfully). I ended up ending the scarf when the length "felt right" but it actually matched the number of repeats the pattern author suggested! The pattern, while tedious to make, ended up beautiful, and might have been a bit more enjoyable with a different yarn - I don't feel like I will use this pattern again, but if so, I'll make something smaller and with a better yarn and see if I like the pattern better and find it less wearisome.

The yarn: This is the same yarn you might recognize from the Cedar Leaf Shawlette I finished in October 2018. Here are all the posts about that one:
WIP Leafy Shawl, Sept. 8, 2018
WIP Green Leafy Shawl part 2, Sept. 15, 2018
WIP Cedar Leaf Shawlette Part 3, Sept. 22, 2018
Cedarleaf Shawlette WIP Update 4, Sept. 29, 2018
Completed Green Cedar Leaf Shawlette, Oct. 28, 2018
Completed Cedar Leaf Shawlete, Nov. 3, 2018

Here are all the prior posts about this cowl:

WIP Leafy Cowl, Oct. 27, 2018
New Folia Cowl, post 2, Nov. 10, 2018
Folia Cowl, post 3 (work in progress), April 13, 2019

The Shawlette sits farther out on my shoulders, so the yarn is less of an issue, but with the cowl, it sits right up against my neck if I'm not careful, so the scratchiness of the yarn is a bit of a downer.

The length and pattern progressing.

Trying to figure out what length to stop at.

Testing the length.
Figuring out where to put the closure.
A close-up of the pattern. The part between my fingers is one vertical repeat of the lace pattern.

Bound off!

The finished cowl!

Spread out in the shape I would wear it.
  
How it looks on me!

And, a year later, it's finally done! I haven't worn it with any outfit yet (the picture above was a trial run), so we'll see if it ends up being a wardrobe staple or not.

Yours,

Sarah

To subscribe, find the "subscribe by email" note in the left column and enter your email there. Links to posts will be emailed directly to you whenever I post them! Nothing else gets emailed.

Resource list: Visit my spreadsheet at www.tinyurl.com/infantloss

Wednesday, February 28, 2018

Pocket and Bustles


Hi Friends!!!

As you may have seen or heard, I recently went to a ball, so there will be several posts related to that coming up.

As I was preparing for the ball, I realized that since a friend was making my ball gown (Sarah Crow, The Preacher Wife's Gowns and Carr Antiquities (Facebook)), it was my job to make sure I had all the under layers and "shape wear" I needed!

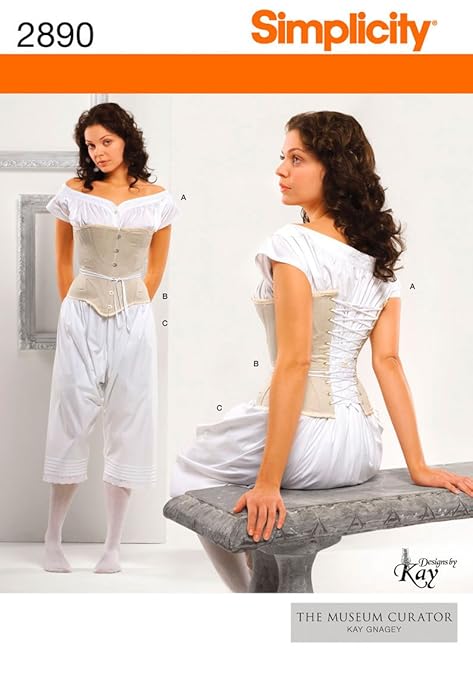
My primary project was a chemise, which functions like an undershirt, basically, and has enough sleeve to keep your underarm from affecting the pretty dress, and gives you a layer against your skin before you put on other things. I didn't get any in progress pictures on that one except for the picture of pleats at the top of the post! To me, pleats are the simplest and quickest version of gathering a wide amount of fabric into a small space. Some people prefer gauging/cartridge pleating, or prefer gathering. Here's the thing, though: as long as the pleats don't have to be perfect-perfect, and can be large, I find I can spend much less time handling the fabric.

https://www.amazon.com/Simplicity-Curator-Pattern-2890-16-18-20-22-24/dp/B004NBXQNA
The lady on the right is wearing a chemise; the lady on the left has a chemise, drawers over that, and then her corset.

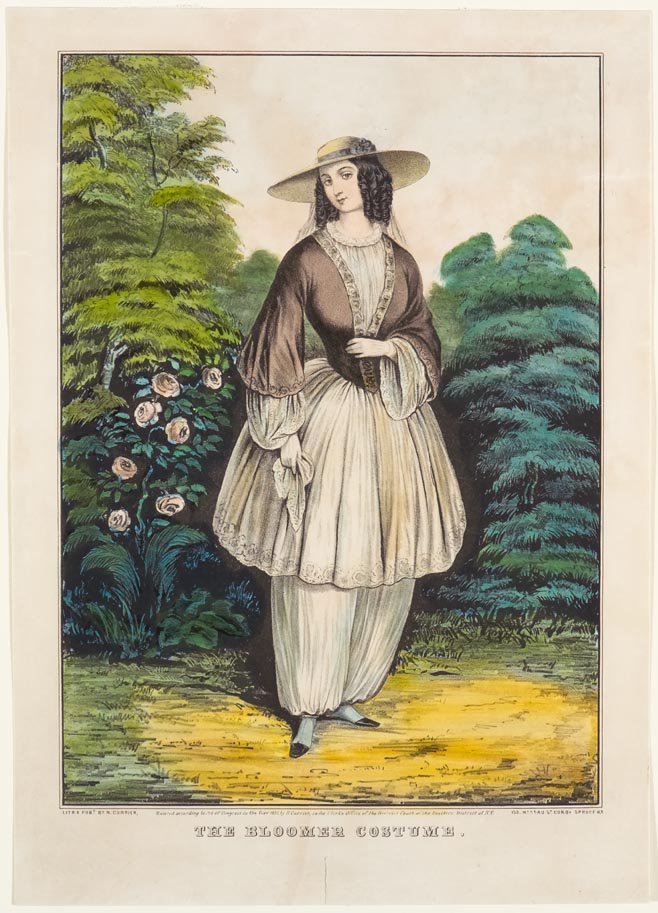
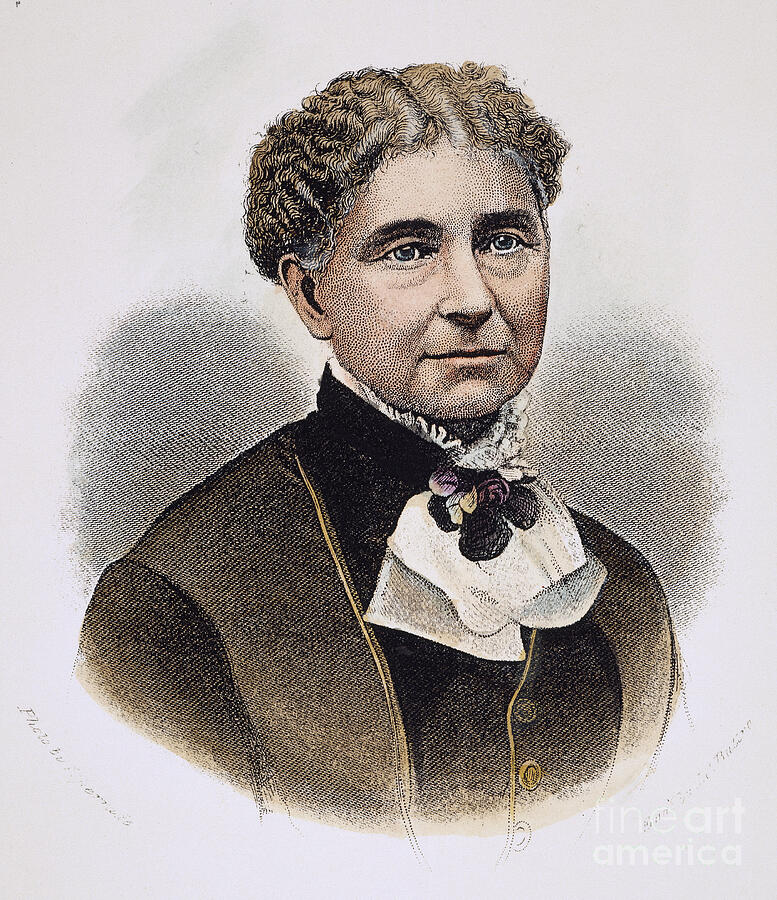
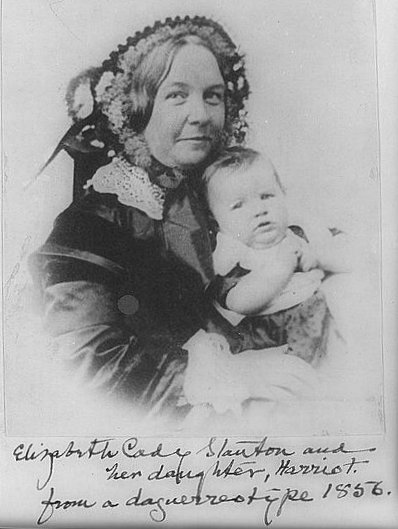
I also threw together some drawers, which are sometimes referred to as "bloomers" by non-costumers. Here's the difference: drawers are "undies", generally were not sewn along the crotch so they didn't make you do as many gymnastics while in a hoop dress (and were a kind of automatic seat liner...!), and would not show at all, since they often came to just below the knee. Bloomers, however, nicknamed after Amelia Bloomer (but actually more widely worn and championed by Elizabeth Cady Stanton), were outerwear. They were a form of early pants for women, but still involved a lot of fabric for decency, and were only used in certain situations (such as bicycling and sports) or by certain women (clothing reformers, primarily. And please don't call either drawers or Bloomers "pantaloons"! I believe that is a later term, and, in any case, is often referring to something seen peeking out below skirts in vaguely historic-esque westerns filmed in the 1960s...

https://springfieldmuseums.org/wp-content/uploads/2015/10/the-bloomer-costume-by-nathaniel-currier.jpg

http://images.fineartamerica.com/images-medium-large/3-amelia-bloomer-1818-1894-granger.jpg
Amelia Bloomer

https://upload.wikimedia.org/wikipedia/commons/4/48/ElizabethCadyStanton.jpg
Elizabeth Cady Stanton
Then once the essentials were taken care of, it was time to work on some invisible accessories. By invisible I simply mean that when fully attired for the ball, you might be able to guess these were there, but you'd never see them. When wearing hoops, they ought to balance around your body a bit like a bell, and a person's body shape affects how they hang and how well they provide what is called "back thrust" (a bit more hoop behind than in front), which became more and more desired as the 1860s progressed (and eventually developed into the bustle of the 1880s and 1890s).

However, I have a more prominent belly and less going on behind, so my hoops tend to sway forward rather than back. Luckily, I'm not the first person in the last 150 years to have this problem! As a solution, placing a well-stuffed pad where there isn't any natural padding will help the bulk of the skirts stay in the back.
Based on Elizabeth Stewart Clark's pattern in The Dressmaker's Guide, I came up with these: the left shape is what the pattern gave me, the right shape was me thinking that the first one couldn't possibly be big enough and must be too wide... Guess who was right? (hint... not me...). The one on the left works beautifully, and gives my skirts a lovely shape. I haven't used the one on the right, but I'll keep it for now and see if I find a use for it.
They are made with cotton, cut as 2 crescents, sewn together with wrong sides facing (leave a gap), add the waistband, THEN stuff (if you are using a machine. If by hand, stuffing first gives the advantage of being able to toy with size, fluff level, and placement, but if you try to add the waistband next by machine, you'll be cursing the day you were born because there just isn't enough room for the foot to get to where you want the seam. I may have figured this out the hard way.). The waistbands close with buttons.


One of my sisters asked why I was using such a fancy fabric. The answer is twofold: I had it on hand with no plans for it, and it's pretty! It is not a reproduction fabric, and in fact is not even one I bought with this era in mind. It is, however, close-ish, AND, more importantly, not visible from the outside! I try not to make non-period concessions like this, but... SO PRETTY!!!

The second thing I made with the ball in mind is a pocket, which gets tied (or buttoned) around the waist beneath the skirt. Some skirts had pockets sewn in, but some didn't. However, most had a closure or a slit placed in such a way that you could reach through and into this style of pocket. I had one before, but it wasn't pretty (!) and was so shallow I was worried I'd constantly loose things. This one is almost too deep! I love it though!

It is made with cotton. The front is 2 pieces that add up to wider than the back, so I could make a seam down the center with a slit in the upper portion as the access. The waistband (which could be narrower) is long so I can tie it on, but you could do buttons if you wanted to.


See you soon with 2 posts about new dresses! Lots of posts in the works, guys!

Yours,

Sarah

To subscribe, find the "subscribe by email" note in the left column and enter your email there. Posts will be emailed directly to you whenever I post them!

Resource list: Visit my spreadsheet at www.tinyurl.com/infantloss
Wednesday, December 7, 2016

Baby Set


Dearest Readers,

I made this earlier this year. After I finished it, I put down knitting, and even other crafts and sewing, for a long time. I didn't realize that I hadn't posted pictures! I am now experiencing a knitting renaissance, and will likely be posting many more knitted items :)

Garment Data:
- Type: Sweater and bonnet set
- Date made: Early 2016
- Pattern: See picture below of the book
- Fabric/Materials: Wool yarn, bought at a local yarn store
- Trim: none
- Time to finish: A few weeks, if I recall


This is my all-time favorite pattern book. I bought it as a complete splurge once, and have used it successfully for many, many different events.
My supplies. Wool, and 4 sets of needles: Size 3s and size 5s, in rounds and in DPNs (double pointed needles). I like using round needles even when doing flat work, because my work can't "fall off" of the other end of the needle. Also, the stiff portion can be shorter than a single pointed needle, so I feel like it's not unbalanced and "end-heavy" like I feel with long needles. The DPNs are super useful when doing something very small and circular, where you can't get a good angle with only 2 needles.

The finished jacket/sweater. The pattern only calls for a single color, but I wanted the contrast, so I just used dark blue and white for the first and last few rows. I love how it came out!

Finished bonnet. I simply twisted yarn multiple times to create the strings.

The leafy back of the bonnet. SO CUTE! Can't wait to see this on a little one!

Most sincerely yours,
~ Sarah

Saturday, September 10, 2016

1860s Maternity Dress

Hello Friends,

Recently I decided to try to make a maternity-style dress, with the challenges of being able to accommodate different sizes and shapes that a body does during pregnancy. Since different people also carry differently (like high vs. low), the dress does end up being somewhat personalized (such as shoulder-to-waist length), but is much more flexible in sizing than the typical Civil War era dress, especially in the waist. This dress presented some interesting challenges. In the captions I will note some of the issues I encountered with the final product and possible solutions I could implement.

Garment Data:
- Type: Maternity dress, 1860s-style. Long sleeved, day wear.
- Date made: February 2016
- Pattern: self-drafted, based loosely on the pattern my friend Karen drafted for me, and on resources I read on thesewingacademy.org about how maternity dresses were made.
- Fabric/Materials: A heavy fabric I found at goodwill. Possibly meant for drapery and upholstery, this is actually slightly heavier than I'd normally use for a dress, but still light enough that I dared. Quite stiff.
- Trim: Cotton collar and cuffs.
- Time to finish: A few days?


Unfortunately I didn't get many in-progress pictures as I made it, but I have some detail shots and finished-product pictures, so I'll share those!

The fabric. The geometric pattern is good for Civil War era, but the swirly background is modern...

Sharpie for scale :)
Detail of the front bodice drawstrings. There is a set like this on either side of the front bodice. I created it by sewing a strip of muslin to the widened bodice front, and then sewed down the middle (I did not sew down the ends). I then threaded a bias tape through both tunnels so that the ends came out next to the front closure. Hope that makes sense!

The dress, part way done. Note the pins marking where I'll be putting buttons!
The waist is also bigger than usual, with an 8" overlap. I can change it to match the size needed, just by moving the hooks that close the waistband.

Seated, with hoops (no corset). While a gestational corset could certainly be used, I did not have one to work with. But since the bodice front is made to be more roomy anyway, the shifted and less structured body works beneath it.

Front view. It buttons down the front. Note that you can see the skirt overlap, and that it falls very un-gracefully. I could probably remedy this partially by making most of the skirt gauged instead of wide pleats, and then I could even have the front portion on drawstrings like the bodice so that it is easier to adjust.

Side view. You can see here that the skirt looks a little strained around the circumference of the hoops. I have extra fabric, so if I change from knife pleats to cartridge pleats (gauging), I will also add another panel. This will soften the way the skirt falls, I hope. I will also wash the dress at some point :) and see if the stiffness is partially some sort of sizing. If so, I think it will also hang more naturally after that.


Rear view. They back has not been altered from my normal pattern, so this is pretty standard. YES, I know the petticoat is showing!!! I didn't know it until I saw the pictures, though... :( I will shorten them soon. The petticoats were also made with a longer waistband than usual, but thus also have the overlap/awkward front problem. I think a partial drawstring waist may be a solution that would work, but I need to see if I can find out what was done. Possibly just resetting the waistband each time it doesn't fit well? (If you know, please post in the comments below!!!)

I also made a new narrow collar and white cuffs. Not perfect, but they work. The cuffs should be rotated more toward the back, but otherwise worked pretty well.


Most sincerely yours,
~ Sarah

Tuesday, August 16, 2016

1860s-Style Mourning Dress

Hi Friends,

As some of you know, we recently experienced a loss in our family. This led me (of course!) to looking into historical customs of mourning, specifically for the American Civil War era (1861-65).

Garment Data:
- Type: Dress, specifically for mourning or half mourning, depending on the accessories
- Date made: August 2016
- Pattern: My personalized Civil War "Day Dress" pattern, drafted by my friend Karen, adjusted slightly at the neckline, and with sleeves I drafted myself. Also, assisted by the Dressmaker's Guide by Elizabeth Stewart Clark
- Fabric/Materials: Linen, cotton lining/hem facing, polyester chiffon for the veil
- Trim: Nylon velvet ribbon (1-1/2" and 3/8"), lace (poly?), cotton hem tape (1" twill tape), plastic buttons, 2 pants hooks for waist closure
- Accessories: Brooch, Belt, Belt buckle, Headband, Veil, Hairnet, Shoes
- Time to finish: approximately 3 days

I was originally intending to make this dress from a light-weight or even sheer wool. However, I could not find it easily locally, and since I had a timeline in which I wanted to make it (I wanted to wear it to the Hale Farm (Ohio) reenactment on August 13th), I needed fabric to be available quickly. As it turned out, I knew someone who had over 6 yards of black linen - and, bonus, a roll of 3-1/2" black lace! I did a little bit of research to see if that would work. Linen was rare by this point, so it is a bit of a stretch but still possible.

Due to time constraints, as well as budgetary ones, here are the corners I cut:
- I used linen, a material no longer much in use in the 1860s for dresses
- I used a blue print for the lining rather than a polished cotton
- I did not make or use a bias piping on the armscye
- I did not make/cover a bonnet (though I did buy some of the materials...)
- I forgot pockets
- I used poly chiffon instead of crape

In all, though, it came together well! Here are the pictures:

Cutting the skirt. I based the number of panels on the yardage I had left after cutting the bodice and sleeves. I had enough length left for 3 panels, and they are about 60" wide, so that was fine.

Adding the hem facing at the bottom of the skirt.

Completed skirt (inside out) showing the hem facing.

Nearly completed bodice back. Note that the sleeves are still uncuffed.

Nearly completed bodice front. Note that I have not yet added darts or finished the front edge.


Shoe options at Goodwill. I realized last minute I had no black footwear that would be even halfway passable!!! I went with the top pair due to the overall look and that they were black. The bottom pair had a thick heel and were gray, which I didn't like.

Pinning on the trim. Note that I had already gathered the skirt at this point, using 2 layers of aligned gathering stitches in anticipation of gauging (is that the same as cartridge pleating?). I had tried larger pleats but noticed that the fabric was too bulky, so despite time constraints, I was going to have to gauge the skirt.

Laying everything out to make sure I had everything I needed :)

Completed dress!!! Just in time... this is the night before. I would still have to add the waist hooks in the morning, and complete the headdress and belt, but I had the bulk done! Hurrah!

At Hale Farm. I am wearing a ribbon headband, a hairnet, veil; period glasses, reproduction brooch, gloves; velvet ribbon belt with reproduction buckle; and the dress. The funny wrinkle-tuck at my waist is because I realized that the way I did the waistband of the dress caused the bodice to be too long. I pinned it up for the duration of this event, and will take it in permanently when I have the chance.

Here you can see the line of hem tape as well.


Detail of trim lines at bottom of skirt. They are all sewn on along the upper edge.

Dearest husband is the one taking the pictures! :)

The reproduction brooch by Elizabeth Aldridge, and the matte plastic shank buttons.

Velvet ribbon belt with reproduction buckle by Elizabeth Aldridge. You can see that my "fly" is gaping a little and I had to pin it shut. Not sure how to remedy that. You can also see my hasty pinned tuck to shorten the bodice. I can fix it much more elegantly, but that worked for the day!

Close up of the gauging along the waistband. I folded about 3" of the skirt down, then did pleating stitches in black thread, that stay in the skirt (two parallel lines of stitches, lined up with each other). I then pulled it tight, and matched the skirt to the waistband. I then whip-stitched one side of each pleat to the waistband from the inside, so only the outside edge of the pleat would show from the outside. Time-consuming, but I love the finished effect!!!

Most sincerely yours,
~ Sarah

Wednesday, September 3, 2014

Blouse

Hello friends!

A dear school chum of mine recently came by with an interesting request.
She held up a well-loved blouse (replete with signs of wear) and asked if I could duplicate it.

WHO AM I TO REFUSE SUCH A CHALLENGE???

OF COURSE I SHALL TAKE IT ON.

And, in the process, discovered what a well made blouse it was, originally. It took simply aaaages to pull apart at the seams!

Garment Data:
- Type: Modern blouse
- Date made: Summer 2014
- Pattern: The original blouse I was to mimic
- Fabric/Materials: a cotton+ stretch poplin
- Trim: none/self fabric
- Time to finish: 9.5 hours, including dis-assembly, tracing, pattern making, cutting, and assembly


Tracing parts after they've been disassembled. I traced them onto brown paper, and eventually used marker to note seam allowances, pleats, grainlines, etc., as well as which piece it was.

The blouse starting to come together. It consists of 1 back piece and 2 pieces for each side of the front, at this point, with the sleeves, cuffs, and 4-piece collar added later.

Every seam on the blouse was flat-felled! Completely brilliant - impossible to take apart! Also means that once I put it back together, the new blouse has a very finished look and is probably smooth and comfy to wear.

The inside, before the sleeves. Doesn't actually look that different from the outside, due to the flat-felled seams.

The shaping pleats/tucks on the back, pre-ironing. Interestingly, a design feature of the original blouse was that the pleats/tucks were visible on the outside back of the blouse.

Attaching the collar. It has rounded points, and is sewn in 4 pieces, 2 for the collar itself, and 2 for the collar band, plus some interfacing for stiffening.

Completed blouse, sans buttons...

...and with buttons:
 

And the hidden lower button placket:

Hope my friend enjoys!!!

Most sincerely yours,
~ Sarah