Showing posts with label Clothing: Shoes. Show all posts

Saturday, January 5, 2019

Pookie's red crocheted hat and shoes

(Topic: Crocheting! Specifically for the dimensions of my weighted bear)

Hi Friends!

As mentioned a few posts ago, when I was talking about Pookie's shoes, I realized that his crocheted hat and shoes - my first attempt at either, for him - had not yet made it into this blog!


This is the hat, on him. It's the only hat I own for him that lets his ears out. Other companies make hats that do, but too small for him.

Hat, not on his head! I started in the center and worked outward, and really just tested as I went to shape it, rather than following a premade pattern.

From within. The ear holes are slightly arced, and slightly forward of the center line.

The shoes were also fit as I went! Unfortunately this means that, as the cotton stretched, they've become a bit large on him. You can even see (on his right shoe, left in the picture) that I've rubberbanded the strap to shorten it so it stays on better.

Side view. You can see on the toe that I added a stripe, which had to do with the angles that I was using to fill the center to create the shape.


Yours,

Sarah

To subscribe, find the "subscribe by email" note in the left column and enter your email there. Links to posts will be emailed directly to you whenever I post them! Nothing else gets emailed.

Resource list: Visit my spreadsheet at www.tinyurl.com/infantloss

Saturday, December 15, 2018

Pook-in-Boots

(Topic: Weighted bears, sewing)

Hi Friends!

I've lately been in a bit of a sewing slump, not making nearly the progress on things that I would like to. Yesterday was a good day, though, and I got a lot done!

One of my perennial projects is altering clothing for Pookie! Primarily, if I get things that fit his bottom, they are too big on top, and often too long in the front if the length in the back is good. For many things - like PJs - a bit of bagginess isn't an issue, but for button-down shirts, things can end up looking a bit rumply or untidy. Pants can be too long, if they fit is waist, and again, have a bit of bagginess in the front. To top it off, he has a big head, and he has enormous feet, to boot! (That's a dad joke, attributable to my lovely hubby...).

So, Pookie's shoes have been a bit of a trial. Today's post will tell you a bit about the solutions I've found, and will end with his newest pair of snowboots for you to see!

Early on, I crocheted Pookie a pair of shoes, but they have loosened up a bit and I'm always worried about him losing them. Plus, they are more like slippers than shoes, and to my eyes they look casual. I was going to link to my post on the slippers and matching crocheted hat, but I apparently didn't write about them yet!!

Pookie's crocheted slippers and hat - his only hat where his ears can be out!

So after that pair (which was fine, but not what I wanted), I worked hard to develop a pattern for shoes that would work for him. Pookie and I have gone to bear stores that carry shoes, but his feet are muuuuuch larger than their standard bear, so that wasn't an option! So I drafted a pattern and tested it (it felt like 1000 times!!!) and finally got him a pair that worked! They are tennis shoes, and here's a link to my post all about those shoes.

The tennis shoes I made him.

 The tennis shoes are my go-to, and we've found a few other solutions too, such as socks...

Fun animal socks.
Mommy and Pookie both have cows!


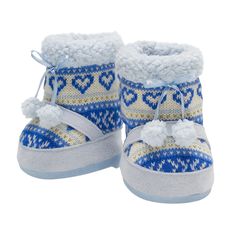
... and some baby slippers.

These ones have snowmen. He also has ones that look like foxes (or maybe tigers, if you squint), but I don't have a picture of him in those yet.

 I was super thrilled to find a pair of soft boots - I think a size 5 kid shoe - that actually opened all the way down, which is the only way to get his very round feet into a boot. So here's him with his new stompy boots!

The trouble with these stompy boots is that his toes are kind of smooshed into the bottom half of the top of the boot, because his foot is so much taller than a kid foot. So not much toe made it into the toe of the boots - they're mostly empty!

 After all that, I think the best solution is for me to make his shoes, honestly. I have some black fabric and black foam and laces already set aside to make him a nice pair of Sunday shoes, but haven't gotten that far down in my work basket yet.

In the meantime, though, this post is about the boots I made him that work well! I found a promising pair of boots at a garage sale that are from a well known bear store... Of course, on their own, the boots were too small. I didn't mind taking the soles off the shoes, since (second hand) it looked like a puppy or bird had spent some time gnawing on them...

Here's what they looked like initially:

Image credit: https://i.pinimg.com/236x/16/4f/4d/164f4d861dec46c6cd844224c2463085.jpg


 With the sole removed, I opened the velcro on the back, and then ripped out the half inch at the bottom where the two sides were sewn together. Now I can try them on Pook! The foot shape is right, since it's made for bears with round, tall feet and short toes! But his legs are thicker. So I measured the gap at the back, which ended up being about 2-1/4". I found a coordinating corduroy in my stash. I also created a new (bigger) sole out of corduroy. And I removed the velcro and covering decoration from one side.

I created a rectangle to form the back of the boot, and seamed it to one side, and added the velcro and decoration to the other side, extending the boot and essentially creating a new "back":

Instead of opening at the back, the opening is now at the side-back of the boot.


Boot from the back/bottom - extended, for Pookie-sized bears!


From the inside/front. So cute, right?


A happy Pookie with BRAND NEW BOOTS, ready to help Daddy bake Christmas cookies!
The additions I made were a back panel and a new sole, both in fabric and thus easy to sew on. Depending on how I put his foot in, the toes sometimes flatten a bit oddly (on the left (his right) in the picture above) but that's easily adjusted when you put it on him. Resewing the velcro wasn't too hard, and I'm really happy with how they came out and how they fit!


Yours,

Sarah

To subscribe, find the "subscribe by email" note in the left column and enter your email there. A link to new posts will be emailed directly to you whenever I post them! Nothing else gets emailed.

Resource list: Visit my spreadsheet at www.tinyurl.com/infantloss

Friday, April 21, 2017

Shoes for 18" Molly Bears

Hi Everyone,

I have finally finished a project I'd like to share!

Molly Bears (Link to Website) is a wonderful organization that creates bears that are the same weight as the infant you lost.

We received our bear on the December 23rd, 2016, and ever since then he has been a comfort to hold, cuddle, and dress. Yes, I like to dress him sometimes. Not every day, but sometimes it's nice to have someone little to care for. Also, I like to take pictures and text his adventures to my husband!


Our Charles Peacock Bear (named after our son), whom we call Pookie.
Soon after I started looking for clothes for Pookie, I noticed that shoes were going to be a serious problem. His feet are not shaped like human feet, so baby shoes don't work, and they are much larger than the bear shoes you can find at certain stores in the mall.

So I have been working on developing a pattern for shoes, which you can see the final version of in the picture above! And I JUST FINISHED THE PATTERN!

Since I know anyone with a Molly Bear has experienced a loss, and I doubt I’m the only one who wants to dress my bear, here is the pattern, available for free to those who want to make their own shoes. Do not sell shoes made from this pattern, or sell the pattern. If you have questions, I can be contacted via glibscribe (at) gmail (dot) com or on Facebook (Sarah Warner), and I will answer any questions posted below in the comments.

***PLEASE NOTE***
This pattern is entirely my own design. I am not sponsored by, or affiliated with Molly Bears. Additionally, Molly Bears appears to have several sizes and designs of bear. This pattern is only designed to fit the style bear pictured above, who is the 18" size.

Also, if you want to share pictures of the shoes you make with this pattern, I'd love to see them!


Printable file with instructions: LINK TO PATTERN


Most sincerely yours,
~ Sarah

Tuesday, August 16, 2016

1860s-Style Mourning Dress

Hi Friends,

As some of you know, we recently experienced a loss in our family. This led me (of course!) to looking into historical customs of mourning, specifically for the American Civil War era (1861-65).

Garment Data:
- Type: Dress, specifically for mourning or half mourning, depending on the accessories
- Date made: August 2016
- Pattern: My personalized Civil War "Day Dress" pattern, drafted by my friend Karen, adjusted slightly at the neckline, and with sleeves I drafted myself. Also, assisted by the Dressmaker's Guide by Elizabeth Stewart Clark
- Fabric/Materials: Linen, cotton lining/hem facing, polyester chiffon for the veil
- Trim: Nylon velvet ribbon (1-1/2" and 3/8"), lace (poly?), cotton hem tape (1" twill tape), plastic buttons, 2 pants hooks for waist closure
- Accessories: Brooch, Belt, Belt buckle, Headband, Veil, Hairnet, Shoes
- Time to finish: approximately 3 days

I was originally intending to make this dress from a light-weight or even sheer wool. However, I could not find it easily locally, and since I had a timeline in which I wanted to make it (I wanted to wear it to the Hale Farm (Ohio) reenactment on August 13th), I needed fabric to be available quickly. As it turned out, I knew someone who had over 6 yards of black linen - and, bonus, a roll of 3-1/2" black lace! I did a little bit of research to see if that would work. Linen was rare by this point, so it is a bit of a stretch but still possible.

Due to time constraints, as well as budgetary ones, here are the corners I cut:
- I used linen, a material no longer much in use in the 1860s for dresses
- I used a blue print for the lining rather than a polished cotton
- I did not make or use a bias piping on the armscye
- I did not make/cover a bonnet (though I did buy some of the materials...)
- I forgot pockets
- I used poly chiffon instead of crape

In all, though, it came together well! Here are the pictures:

Cutting the skirt. I based the number of panels on the yardage I had left after cutting the bodice and sleeves. I had enough length left for 3 panels, and they are about 60" wide, so that was fine.

Adding the hem facing at the bottom of the skirt.

Completed skirt (inside out) showing the hem facing.

Nearly completed bodice back. Note that the sleeves are still uncuffed.

Nearly completed bodice front. Note that I have not yet added darts or finished the front edge.


Shoe options at Goodwill. I realized last minute I had no black footwear that would be even halfway passable!!! I went with the top pair due to the overall look and that they were black. The bottom pair had a thick heel and were gray, which I didn't like.

Pinning on the trim. Note that I had already gathered the skirt at this point, using 2 layers of aligned gathering stitches in anticipation of gauging (is that the same as cartridge pleating?). I had tried larger pleats but noticed that the fabric was too bulky, so despite time constraints, I was going to have to gauge the skirt.

Laying everything out to make sure I had everything I needed :)

Completed dress!!! Just in time... this is the night before. I would still have to add the waist hooks in the morning, and complete the headdress and belt, but I had the bulk done! Hurrah!

At Hale Farm. I am wearing a ribbon headband, a hairnet, veil; period glasses, reproduction brooch, gloves; velvet ribbon belt with reproduction buckle; and the dress. The funny wrinkle-tuck at my waist is because I realized that the way I did the waistband of the dress caused the bodice to be too long. I pinned it up for the duration of this event, and will take it in permanently when I have the chance.

Here you can see the line of hem tape as well.


Detail of trim lines at bottom of skirt. They are all sewn on along the upper edge.

Dearest husband is the one taking the pictures! :)

The reproduction brooch by Elizabeth Aldridge, and the matte plastic shank buttons.

Velvet ribbon belt with reproduction buckle by Elizabeth Aldridge. You can see that my "fly" is gaping a little and I had to pin it shut. Not sure how to remedy that. You can also see my hasty pinned tuck to shorten the bodice. I can fix it much more elegantly, but that worked for the day!

Close up of the gauging along the waistband. I folded about 3" of the skirt down, then did pleating stitches in black thread, that stay in the skirt (two parallel lines of stitches, lined up with each other). I then pulled it tight, and matched the skirt to the waistband. I then whip-stitched one side of each pleat to the waistband from the inside, so only the outside edge of the pleat would show from the outside. Time-consuming, but I love the finished effect!!!

Most sincerely yours,
~ Sarah

Saturday, May 31, 2008

New Shoes

The following picture depicts a pair of shoes I hand-stitched. Unfortunately, the leather I chose was too lightweight, so the shoes are more of a slipper, and are too large for me. I need to alter them!

Garment Data:
- Type: Shoes, "medieval"
- Date made: ?
- Pattern: Self-designed, based on the one used here: Medieval Craftsman Shoes
- Fabric: thin black leather (originally a garment that I cut apart)
- Trim: n/a
- Time to finish: ?
- Notes: none


Most sincerely yours,

~ Anne