Showing posts with label Material: Ribbon. Show all posts

Wednesday, April 3, 2019

Awareness Ribbon Shirt

(Topic: Grief, being in public, explaining)

Hi Friends,

Remember this shirt?


A few days ago, I talked about how I altered the sleeves. Today I want to talk about wearing it.

Here's a picture of the front:


I first wore this in public on Mother's Day last year, and have worn it occasionally since. One of the reasons I like it is that it makes "being a mom" visible for me - I'm otherwise invisible as a mom unless you know me. I also feel that the awareness ribbon is fairly evident and recognizable. (I'll talk some other time about the pros and cons of the word "angel" in this context.)

Still, when wearing it, I have to balance being visible/recognized with being misunderstood or having to explain.

In fact, I've had two blatant misunderstandings, both leaving me baffled, when I thought the awareness ribbon shape is pretty widely understood in our culture.

Misunderstanding 1)
I wish my kid was an angel! (i.e. "well-behaved")

Misunderstanding 2)
I should have a shirt that says I'M an angel, for putting up with my wife!!!

I'm really baffled. I know I'm putting myself out there, by wearing a shirt like this, but I expected (like when carrying Pookie around) that people would say trite things and ask questions that bring Charlie up. I really didn't expect the self-centered misunderstandings that disregard the ribbon and the possible meanings of the text.

It's a truly unanticipated difficulty, honestly. I'm just not sure what to think.


Yours,

Sarah

To subscribe, find the "subscribe by email" note in the left column and enter your email there. Links to posts will be emailed directly to you whenever I post them! Nothing else gets emailed.

Resource list: Visit my spreadsheet at www.tinyurl.com/infantloss

Wednesday, September 5, 2018

My First 5K

(Topic: Fitness, In Memory, Hiking)


Dear Friends,

I am part of a lovely group of ladies on Facebook, all of whom are committed to trying to become more healthy, and all of whom have experienced loss - I believe all of us have experienced late pregnancy loss. It's a fabulously supportive group, because we are all there for a reason but we also all understand the emotional sensitivities that we are prone to.

Each month on Facebook we start a new group, so we can stay focused month by month. In the most recent month, August, we focused on distance - communally. So while each of us did not necessarily contribute a huge number of miles, together we counted steps and did the equivalent of the distance from Ireland to Paris, which is pretty cool!

As part of trying to walk more, one person suggested doing a walk from RunMotivators.com, in this case one of their charity races. Basically, RunMotivators is a website where you can purchase medals like those you would get at the end of a race - and you complete the miles on your own (honor system). This makes it more fun to add fitness to your life! It's a "virtual race" since the individuals doing it are not doing it on the same day in the same place, and there are no winners/losers. If you go to the website, you can pick out different races to participate in, based on length or the theme, whatever gets you excited to move! For instance, there are races with Harry Potter themes, and some that are short and some that are long, and some that support charities like "save the manatees", or, in our particular case, several of us from our group decided to all order medals for the "Run For The Angels" race, in which a portion of our race fee for the medal (and paper race bib) went to a foundation called Share: Pregnancy & Infant Loss Support: "This non-profit organization provides support and education across the country for miscarriage, stillbirth, and infant loss".

(If you go to the website, hover over "Events" and hover over "Virtual Events", you'll see a list of current themes, and then if you click on "Fundraisers and Charity Events", this is where they list the ones where a portion of the proceeds go to a good cause. This is where any of their Angel races are listed when active. http://www.runmotivators.com/events/fundraisers-and-charities I'm noticing that, as I write this, Run For The Angels is still listed, but I know it's likely to sell out. So if you want to participate, please do! You can do it as a 5K, 10K, or half marathon.)

We all agreed on a day that we would do our race - though this is not necessary at all, it was fun and helped us know we were not alone in supporting our babies or in trying to improve our fitness. On that day, I decided that since I don't run yet, hiking a 5K was probably about my speed. I picked out a couple of trail options, knowing that bathrooms and trail length would be my limitations.

The first trail I picked was a wooded loop that was about half the length I needed, with no facilities. So I stopped at the library before, walked the loop, and then dashed back to the library after!

Trail says it's about 1.4 mi, but there's an optional little loop at the far end that I did, and I logged 1.7 miles.

I had never been on this trail before. It was startlingly beautiful, and just enough on the edge of town to be very quiet. Portions were more meadow-like, some was wooded, some was wooded with ferns and moss, and there was also a creek. Beautiful and peaceful.

The creek.

Strangely golden mushrooms.
Final details of the first loop

Once I finished this leg and my pitstop, I found another trail nearby that looked like it might be fun and was new to me.


This trail is a boardwalk around a dammed lily pond. Not actually long enough, but by adding a spur and looping the pond twice, I hit my 5K mark!

There were a lot of turtles. Didn't see much other wildlife, but there were quite a few people and it was the middle of the day, so I'm not surprised.

Turtles!

Did you know this? I did not know this! How neat!

More turtles! I probably saw two dozen.

The pond. It's bigger than than just what shows here, but not huge.

Following a spur trail and adding a second loop got me to 1.4 miles - added to the 1.71 from earlier gives me 3.11. Since 3.1 miles is 5K, there we go!!!!


As you saw at the beginning of the post, the medal is a suncatcher and is beautiful up against the light. I did my walk so soon after I ordered the medal that I didn't have it right away, but when I came in the mail it was amazing! Here's a close up of the medal itself:


The ribbon is pink/blue like the infant loss awareness ribbon, and says "Run for the Angels 2018 5K 10K 13.1" and on the other side it says "I run for the feet that never had the chance to run on Earth". I think I wore it the whole day!

I had a lot of fun with this, and I even signed up for another "real" race - coming up in about a week. It's a 5K too, but I'm stepping of a starting line with hundreds of other people, so this will be a new experience! I'm planning to walk it again. At this point I'm not running. Who knows - maybe someday I'll build up to that??


Yours,

Sarah

To subscribe, find the "subscribe by email" note in the left column and enter your email there. Posts will be emailed directly to you whenever I post them!

Resource list: Visit my spreadsheet at www.tinyurl.com/infantloss

Saturday, March 24, 2018

Semi-Sheer Pink Day Dress


Dear Friends,

"How long did it take you to make that?"
I hear this question a lot, but it's not as simple as that. Remember, some of the details that make it take time (such as having matching piping, linings, lower hem linings, hand stitching, hand button holes, etc), don't necessarily show easily or obviously to the untrained eye.

Additionally, even if you are doing something basic, can it take a long time? Sure! Can something complicated go fairly quickly? Definitely! It's a combination of your materials, your tools, the techniques you decide to employ, and the care you take, as well as the skill and amount of practice you have.

This dress I'm about to show you is honestly the fastest I've ever made a dress. But: don't feel like this is a benchmark. I'll point out some corners I wish I hadn't cut, some things I wish I done differently, and I'll tell you right now that I was way too tired the next day. But I looked amazing!

This dress took me about 12 hours, start to finish. I used far less hand sewing than I often do, and didn't check to make sure my striping lined up or that my pleats were even. From prior posts, you'll likely remember I had more urgent items I was working on that are part of the support structure and undergarments, so this dress was really low priority and thus came absolute last.

Also, I should have been doing my sewing much earlier, so it didn't become a cram session. BUT I REALLY WANTED A PRETTY DRESS!!! So my motivation was very high. I skipped some housework and maybe even a meal, getting so caught up in the sewing process :) :)

The fabric. Semi-sheer striped cotton. I randomly had a whole bolt that my mom had given me. I didn't measure the yardage ahead of time. I cut 4 panels each about 50" long, plus cut sleeves and a bodice. And I still have about a yard left - which is really good, given my sleeve issue I'll mention later. So maybe I used 6 or 7 yards.

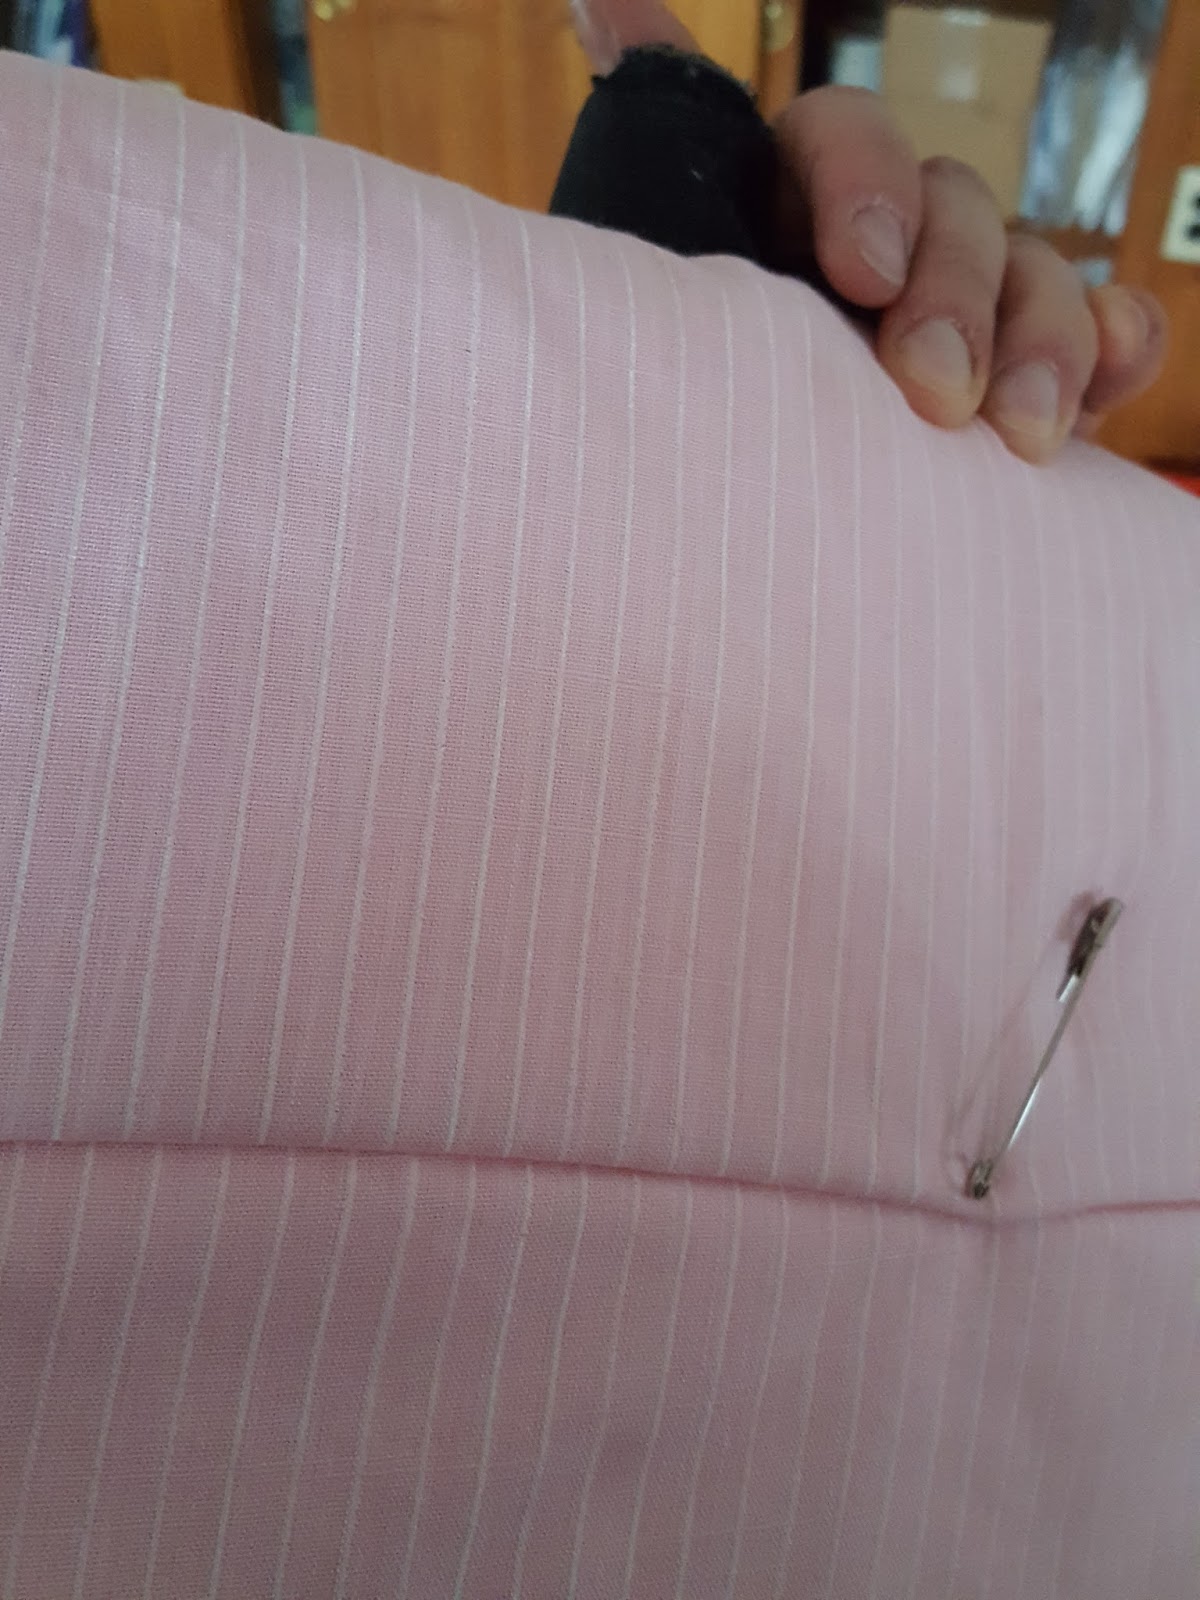
When the light isn't behind it, it's not super sheer.

With the light behind it.
I already have a basic bodice pattern, that was drafted for me by a friend when she made my wedding dress (which was very Civil War era inspired). But it's been a few years, and my body has changed shape, and I knew which parts of the pattern didn't fit right. So as I cut out pieces, I adjusted.

I also intended this to be more of a gathered-front dress, but didn't swing out the bottom edge of the bodice nearly enough. So I just had a few little pleats, but not what I was aiming for. Beneath the pink, there is a fitted half-high white muslin bodice lining, but I forgot in my haste that I meant to make that the structural closure and let the pink float on top in the front. That gave me some extra fabric and extra tension issues at the front closure.

I was doing as much by machine as I could, and before I started this, I'd made sure my other projects were done - but I'd realized that I could do some things in my hotel room, so I'd actually not attached the buttons to my other items yet, and I finished as much of the dress assembly as I could by machine at home, and did all the button holes by machine, but left ironing, hooks and eyes, buttons, and attaching the waistband to the skirt and then to the bodice (hand stitching) until I was in the hotel room.

The only major issue I didn't catch at home was that the sleeve pattern I had was actually much smaller than my arms. So in the pictures below you can see how, while wearable, these sleeves really don't fit well at all. Somehow I found time to make bias piping for the armscyes, but I think I'll have to take out the sleeves entirely, open up the armscyes more, re-cut the sleeves, and re-sew them completely. Even the cuffs ended up a bit tight, so I can use the fabric that is currently sleeve and turn them into cuffs, and use my extra fabric to make new sleeves!

Once I was at the hotel, I ironed the big loop of fabric that would become the skirt, and started doing double-stacked knife pleats. For me, especially if I'm not lining up stripes or a plaid or worrying if they are perfectly even, pleats are the quickest way to stuff lots of fabric into a small space (or semi-small. My waist isn't super tiny!!). Then I stitched the waistband on, the bodice to that, and then spent the rest of the night on buttons and hooks and eyes, with the hotel room TV on. And, since I was traveling alone, I couldn't even do them in the car while someone else drove! That's why I got to bed a bit late....

Here's the dress, finally completely assembled, around 1:30am, in the hotel room.

Here you can see that my seam isn't perfectly ironed (I hope it will show less once I go over it again) and that I'm still not great at the waist closure lying smoothly. You can also see if you look closely that the sleeves are small: a bit short, and a bit tight. This is also causing the puckers and gathering under my arms, and the shoulders getting that weird wrinkle going over the top. I think all those will resolve once I fix the sleeves. GAH! I just noticed my petticoat is showing!!! MUST SHORTEN.


I'd intended the neckline to be more of a V, so I may still adjust that. The puckering at the closure is simply because I have not put all the hooks and eyes on yet, so this is more of an every-other emergency measure. I'm also noticing some rippling along the neckline. I'll have to ask some seamstress friends whether a rolled hem might help reduce that, or maybe a facing.

I felt like a floaty flower in this dress.

Sitting for my ferrotype. A photographer was at the event, and while he was using me as a practice subject, my friend snapped this picture of me. Photo credit to The Young Sewphisticate.


Yours,

Sarah

To subscribe, find the "subscribe by email" note in the left column and enter your email there. Posts will be emailed directly to you whenever I post them!

Resource list: Visit my spreadsheet at www.tinyurl.com/infantloss

Saturday, March 17, 2018

Plaid Ball Gown


Dear Friends,

I have recently had the pleasure to have a ball gown made by Sarah Crow, of The Preacher Wife's Gowns and Carr Antiquities (Facebook)!

She and I discussed options, the primary limiting factor being that we would work only with fabric I already owned, with minimal purchases for trim. I had a lovely red/gold plaid silk (with small stripes in navy and green, as well). Using some period images as inspiration, we agreed on a bertha-style, with puff sleeves, and then lace trim with ribbon work. Here are a few of the inspiration images:

1) Just a similar plaid. Since we weren't doing a day dress, this was more to help me picture my flat piece of fabric as a fully formed dress. This pin was originally from Ebay (I think it was a CDV), so there is no link to its original location.

2) Again, a day dress. Yet the way the trim is on the hem and the whole collar/bodice trim was very similar to what I had in mind. There's no good link to an original source, so if you happen to know where this is from, I'd love to cite the source.


3) Day dress.This one is just such a scrumptious blue stripe! Right??? Ok, but seriously, some ideas for a waist treatment (how to attach the skirt). Note that the original Pinterest post is no longer connected to a proper source, so if you know where this is from, please let me know so I can give proper credit/citation!

4) This neckline. This neckline trim. The pleats. The lace. YUM YUM YUM. Note that this Pinterest link also doesn't lead further. Again, if you know the source, please let me know so I can include it!
The sneak preview she sent me... ;)
The bertha was originally going to be a pleated sheer silk, and would be shaped in similarly to image 4 above. Instead, it became a separate piece that sits higher on my shoulders and lower in front, with a higher neckline on the true bodice, and the pleating, believe it or not, is actually the same silk as the dress, just pleated carefully to show only the gold!

Beautiful scrumptious work in progress! This was my main fitting. The minor adjustments I'll make are mainly things like moving a few of the hooks and eyes, since we didn't get a last fitting right before the ball to check those types of things.


And done! This is at the February Ohio Regimental Military Ball (ORMB) in Canton, OH.
I absolutely ADORE all the lacy lace! I felt so beautiful wearing it.

Happy dancers :)


My seamstress friend from The Young Sewphisticate and I, enjoying being beautiful! She also gets credit for loaning me the fluffy lovely cap I'm wearing.

Thank you so much to my friend Sarah Crow for making me this gorgeous gown!


Yours,

Sarah

To subscribe, find the "subscribe by email" note in the left column and enter your email there. Posts will be emailed directly to you whenever I post them!

Resource list: Visit my spreadsheet at www.tinyurl.com/infantloss

Monday, August 7, 2017

Shoe Rosettes

Hi Friends!

Over the past few years in my free time, I've been translating an instructional article from a German magazine called Der Bazar, which was published in the 1800s. This particular article, from 1861, explains how to make fancy bows ("rosettes") to put on women's slippers, shoes, and boots to make them fancy! Rosettes and cockades were worn to decorate items like shoes and belts for ladies, but also worn as brooches, memorial pins, or even political pins!

Here is the original (the text is on both pages; the pictures that go with the article are on the 2nd page):


My translation is below, for those of you who want to try it!

Most sincerely yours,
~ Sarah


Shoe Rosettes
With 10 illustrations
With this rich selection of rosettes we offer our readers the opportunity to do justice on their own to the elegance required by fashion in regards to one's chaussures.
We provide the rosettes in various levels, as well as their size and their original accoutrements -- from the simple little cockade to the trimming decorated with lace and pearls as befits the costly velvet mule, the bridal boot, or ball shoe. A few of the originals shown in the given illustrations are only fitting for this type or that type of footwear due to their style, as pointed out in the note given with the individual descriptions when appropriate; no footwear is out of the question for the use of the remaining rosettes. For indoor slippers or mules, as well as with boots that one wears to the theater, in the carriage, or with evening clothing, fashion dictates that rosette decorations are a color that contrasts with that of the shoe, yet is in harmony with the rest of one's toilette. With walking boots, though, choose trimmings that do not contrast.

No. 1 Rosette á la Pompadour

Materials: 90-100 cm black satin ribbon, 2 cm wide.
The ribbon specified above is basted into very small pleats and is set in a spiral onto a 4 cm round foundation, starting at the outside of the foundation in rows spaced as closely as possible, so that the pleated lines of ribbon stand up.
This rosette can also be made larger, in an oval shape, in which case the foundation is cut in the appropriate shape and, naturally, more ribbon is also used.

No. 2 Cockade Rosette

Materials: 40-44 cm black satin ribbon, 1 cm wide; one small steel buckle.
Lightly singe the ribbon, and tack onto a 3 ½ cm round foundation in 3 or 4 rows in a spiral; slide the buckle decorating the middle onto a smooth piece of the same ribbon.

No. 3 Rosette Impériale

Materials: 70 cm black lace, 2 ½ cm wide; 77 cm currant-red wired chenille; 19 middle-sized foam beads. *Translator's note: Schaumperlen is unclear. It could be foam beads or foam pearls. I mostly see this word used to describe seafoam, so I'm not sure what kind of bead it's referring to.*
Pleat the lace, and baste in 3 tiers in a spiral onto a 3 cm round foundation. Fasten 8 chenille loops between the first and second lace tier. Every loop should have a black foam bead in the middle. Fill in the center with a tuft of chenille loops, the outermost and innermost of which should likewise be decorated with beads.

No. 4 Rosette for Morning Shoes and Mules

Materials: 67 cm brown satin ribbon, 4 cm wide.
In terms of the arrangement of the 6 individual bows and both of the ends that comprise the trimming, we refer you to the illustration, since for this rosette, looking at it is the surest explanation. The bows appear to be held together in the middle with a loosely attached short ribbon loop, but you can pull this smooth through a wide curved buckle to give the whole thing the true character of a shoe rosette.

No. 5 Rosette, Noeud Papillon

Materials: 40 cm black satin ribbon, 1 cm wide; 20 cm of the same ribbon, 2 ½ cm wide.
To arrange this rosette, form 4 individual bows of a 5 cm ribbon length each, and tack these in a half circle to the foundation.  The inner decoration is a cockade made of the narrower ribbon, done just as in No. 2.

No. 6 Boot Rosette

Materials: 140 cm brown satin ribbon, 2 cm wide; a steel buckle.
The long, narrow shape of this rosette makes it suitable only for decorating boots. Cut the foundation for it in a tongue shape, 8 cm long, with one end 4 cm wide and the other end 2 cm wide, and rounded on both ends. Begin on the narrow end and attach the ruffle in two single rows, so that each forms a half circle. On the third row, which follows the second in the same shape, continue the ruffle straight away continuously around the wide end of the foundation and then towards the middle in spiraling oval rings, as far as it reaches. The empty space remaining within the ribbon decoration is covered with the buckle, drawn upon the remaining brown ribbon. The illustration will truly enlighten the understanding of the arrangement described here.

No. 7 Rosette, Noeud Papillon

Materials: 40 cm ponceau satin ribbon, 4 cm wide; 15 cm black lace, 3 cm wide; a small steel buckle. *Translator's note: ponceau appears to be a bright red-orange.*
Make 4 individual bows from the ribbon, each made from a 5 cm length; additionally, make 3 shell-shaped leaves, just like those given in the description of No. 11 — and arrange both sets on the foundation cut in the shape of the rosette — the 4 bows in a half circle on the outside, the 3 leaves in the middle, and the two separated by the black lace. The point where the 3 leaves meet is covered by the buckle drawn onto a piece of the ribbon. When placing this rosette, the straight flat side is put toward the top.

No. 8 Rosette for Morning Shoes and Mules

Materials: 78 centimeters gray taffeta ribbon, 2 to 2 ½ cm wide; 70 cm black lace of the same width.
The foundation of this rosette must be 6 ½ cm long, 4 cm wide, and in the middle, in the shape of the rosette, somewhat narrower. Form 12 individual bows, each made from a 5 cm length, and tack them to the foundation in threes on either side, in horizontal rows and alternating with a crinkled black lace. Fill the gap between these trimmings with 2 small bows set opposite, one pointing up and one down, and cover their attachment with a flat ribbon drawn through a curved buckle.

No. 9 Lace Rosette

Materials: 66 cm black lace, 2 ½ cm wide; a small piece of wide currant-red ribbon or silk cloth; a steel or bronze button.
Cut a 3 ½ cm round disc from strong paper, cover it on one side with lining gauze, and on the other with the colored silk cloth. Divide the black lace onto it in 2 pieces, one 23 cm long and one 43 cm long, and baste each piece in very small pleated folds. On the back, halfway up the width of the lace, draw a fine black silk thread through each pleat, to hold them in evenly in place. Set the longer of the two trimmings around the edge of the round piece, so that it extends beyond the edge by 2 cm all around. Pull the shorter trimming together into a rosette and place it in the center of the red backing, so that it it only appears through the airy lace background.

No. 10 Rosette with Tassels

Materials: 78 cm dark blue taffeta or satin ribbon, 2 ½ cm wide; 33 cm black lace, 3 cm wide; 7 cm very narrow black lace; 2 small blue silk tassels; one small steel buckle.
To make the 15 petals of the rosette, cut the blue ribbon into 5 cm pieces, leaving a 2 cm piece to secure the buckle. To make each individual petal, do the following: Fold both corners of the upper long edge down to the middle of the lower long edge, in opposite directions, so that you form a triangle. Turn the triangle over, and fold both corners from the sides down and somewhat overlapping, so that they extend beyond the bottom edge of the triangle, and so that the top forms the dahlia petals you can see on the illustration. Trim the points that overlap and point down, and fold the lower side corners to the back, so that the the petal gets narrower toward the bottom. Form all the petals in this way, and then decorate every one of them with 3 steel or gold beads in the top of the opening, which you string together and fasten with one vertical stitch. Baste the petals in 2 open circles onto a round stiff foundation you have cut from tulle, gauze, or linen, which has a diameter of about 3 cm, and on one side, following the shape of the rosette, it must be bent and flattened. The arrangement of the petals can be clearly seen on the illustration. Gather the wider lace and surround the rosette with it, by basting the lace to the back of the stiff foundation all the way around. The two tassels can either be thread-covered or made of creped silk. Fasten them in the middle of the rosette such that they hang down through the open side of the surrounding petals. Finish the entirety by taking the narrow lace, pull it together into a small rosette, tack it to the remaining space, and then slide the small horizontal buckle onto the piece of ribbon set aside for this, and fasten it on top. This rosette should be set upon the boot or shoe in such a way that the tassels fall toward the toe.

No. 11 Rosette à Coquille

Materials: 88 cm white satin ribbon, 2 ¼ cm wide; 38 cm white blonde, 2 ½ cm wide; a small steel buckle.
The shell-shaped leaves making up this rosette are folded individually from an 8 cm piece of the ribbon given in the “materials”. Lay the folds from the middle of the bottom edge diagonally toward the corners of the top edge, in 3 folds, first on one side, then the other, which simultaneously form the veins of the leaf and have to reach over one another somewhat in the middle of the leaf. Due to the folds in the middle, the leaf obtains a length of about 3 cm. Trim the bottom to form a straight line.
Cut foundation of this rosette in the shape of a heart, 4 cm tall and 5 wide, and then stitch down the white blonde along the outside edge in folds. On top of this, first place the 7 outer leaves and then the 3 inner leaves as seen in the illustration. A leaf also covers the center, and place atop it the buckle drawn onto a piece of ribbon in a contrasting color. Instead of a leaf, you can take the ribbon that is through the buckle, pull it tight, make a small bow, and stitch in the middle with the buckle. When placing this rosette on a shoe, the pointed side of the rosette should be on the lower side.

Wednesday, October 12, 2016

Forget-Me-Not

Hi Esteemed Friends!

As you may have noticed, I promised the other half of the t-shirt project, and I'm still not done with it... That's because I have a minor hand tendonitis flaring up that I don't want to aggravate, so I used the chance to have my sewing machines serviced. So, several projects have been put on a temporary pause.

However, I discovered that I can still hold an embroidery hoop with the affected hand! So here's the current project.


Garment Project Data:
- Type: Ribbon Embroidered Bookmark
- Date made: October 2016
- Pattern: By Angela Dower, from "A-Z of Ribbon Embroidery" from Search Press Classics.
- Fabric/Materials: Lace-edged bookmark in 18-count Aida (bought with the edging attached). 1/4" polyester ribbon. Cotton Embroidery floss.
- Trim: See above
- Time to finish: One afternoon


This book was on the "new book" shelf at the library, and when I was looking through it, this pattern jumped out at me. I have a friend for whom Forget-Me-Nots are meaningful, so I am doing it for that friend.

The book specified a 4mm-wide silk ribbon and silk embroidery floss. I found silk ribbon to be difficult to obtain, and also it's hard to find ribbon that width, so I'm doing the pattern in 6mm (1/4") ribbon, and it's poly because that was accessible locally. Additionally, I have all the DMC embroidery floss colors in cotton and am on somewhat of a budget right now, so the less I was buying new for this project, the better. I think it turned out ok!


The book itself!


And the back, for those of you who want the isbn :)

The specific instructions. I noticed it wasn't very specific about how to do it (just a basic stitch chart) and it wasn't the clearest instruction ever.

In progress! It's coming along nicely. My petals and leaves have a bit of a stiffer look because I used regular ribbons instead of a nice soft silk, but it still is coming out super pretty!
 
Final result. Apologies for the binder clip: I covered the initials I embroidered. Privacy! I'm very very pleased with how it turned out!
Most sincerely yours,
~ Sarah

Tuesday, September 27, 2016

Patch Banner

Dear Friends,

I was recently inspired by something my mother-in-law made for my husband as a child. Everywhere they traveled, they got patches or pins as a souvenir, and in order to create a way to store and display them, she made him a banner. I have copied her pattern for my own patches, pins, and mementos.

Garment Data:
- Type: Patch display banner
- Date made: September 2016
- Pattern: Anne's design
- Fabric/Materials: 3/4 yard felt, cut to a 23" width, dowel, ball-shaped dowel ends
- Trim: Ribbon, braided cord made out of embroidery floss
- Time to finish: 1 hour?

The completed banner. I have it folded in quarters and just basted onto the rod, so that as I fill it up from the bottom, I can lengthen it (this is also in the original design!).

The items on here are: several civil war style cockades and several trinkets that are used to identify that a reenactor has paid the entrance fee for an event. I have patches too, but haven't found which box they are currently in!

Detail of the ribbon I attached by hand stitching. I finished the ends with Fray-Check. And I cut the bottom of the banner into a point (like my husbands) but instead of adding a fringe like his, I cut a fringe of about 2" or 2-1/2" long.

Detail of the dowel, dowel end, braided cord, and basting stitches.

As I hinted on Facebook, I am also working on adapting a t-shirt. I hope to make that the next post but didn't finish it this week.

Thanks to Anne for her inspiration and  design for this banner!

Most sincerely yours,
~ Sarah

Thursday, September 15, 2016

Dark Hatbox

Hello lads and lasses!

The other night I decorated a hatbox, which I intend to use to store a mourning bonnet. Which I have not yet made, but that will come...
At any rate, I needed a second hatbox and decided to use a darker color scheme to match what I know I will be storing in it.

Garment Project Data:
- Type: Hatbox, purchased at a craft store. It is cardboard.
- Date made: September 2016
- Pattern: none. I just decorated a purchased box
- Fabric/Materials: Paper napkins, tissue paper, ModPodge
- Trim: ribbon (satin and sheer)
- Time to finish: several hours (most of a day?), including drying time.


The completed hat box with the lid perched on a pail to dry.

And the closed view.

Detail of the lid. This oak leaf is one I found outside, already skeletal and beautiful.

The lid has a base of 2 layers of white tissue paper, then the oak leaf. I then added Money Plant seed pods around the outside.

The side of the lid has 2 bands of ribbon, over the white tissue paper.

The box is done in black tissue paper that has rainbow colored sparkles. I then added a double layer of sheer white ribbon along the bottom edge, the same black satin ribbon as the lid but in a "drum" zig-zag pattern, and hearts with a white bird printed on them, which were cut from paper napkins.

Detail of the 2-layer sheer ribbon.
Detail of the heart. Unfortunately they were more sheer than I realized, so the printed white bird is all but invisible. Phooey. There are 8 hearts around the box.

The bottom of the box has a printed tissue paper, plus a blue-white rose cut from the same paper napkins as the hearts.

Most sincerely yours,
~ Sarah